Jmol Tutorial 1
- Home
- Jmol Tutorial 1
- Jmol Tutorial 2
- Jmol Tutorial 3
- Jmol Commands
- Resources Pages
- PDB Tutorial
- SMART Teams
Symposium
Part 1 - Unwrapping the story of insulin
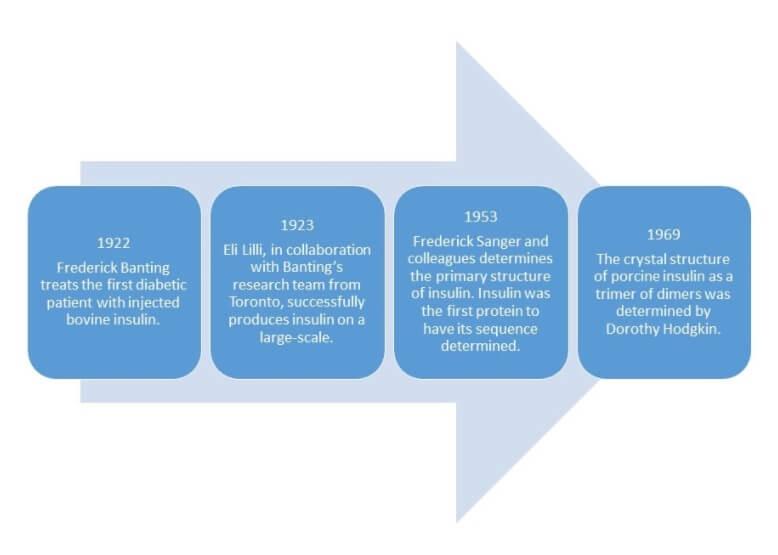
Diabetes has been known as a disease for a long time. Type 1 diabetes was considered incurable and a major cause of juvenile death before 1922. Life expectancy after diagnosis in children was typically less than one year. As a result, research on diabetes has been happening for a long time. To see the progression of knowledge about the disease check out the PDB 101 timeline here.
In a path to finding treatments for patients with diabetes a recurring theme of understanding structure and function has emerged. Scientists have continually sought to understand the structure of insulin to better understand its function in order to identify potential treatments. Some key events in this timeline include:
In order to understand how insulin operates as a trimer of dimers, we are going to start by exploring the active monomeric form of insulin in the molecular visualization software, Jmol.
1. Accessing JUDE:
JUDE is an online form of Jmol, an open source molecular visualization program that runs on a Java platform. To access JUDE open the following URL:
https://www.centerforbiomolecularmodeling.org/modelingResources/jmolUserDesignEnvironment/#forward.
Note: Unfortunately, there is currently no UNDO function in JUDE (they’re working on it!). Save early and save often! Each time you save, number your structure so you know which file is your most recent version.
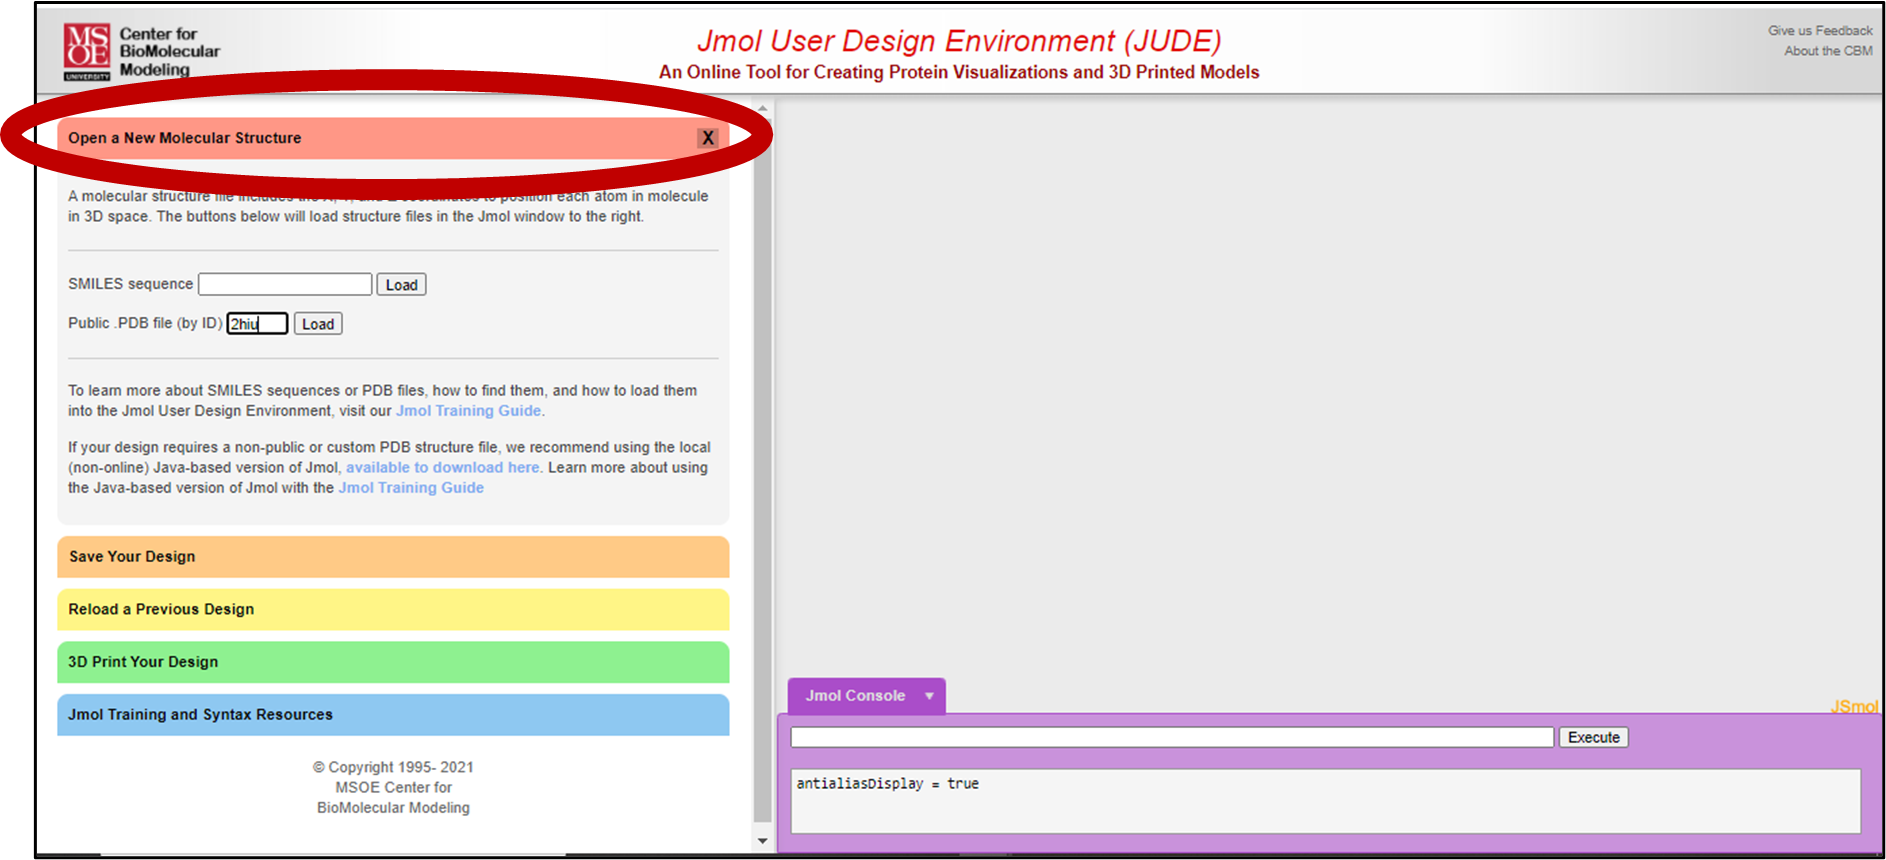
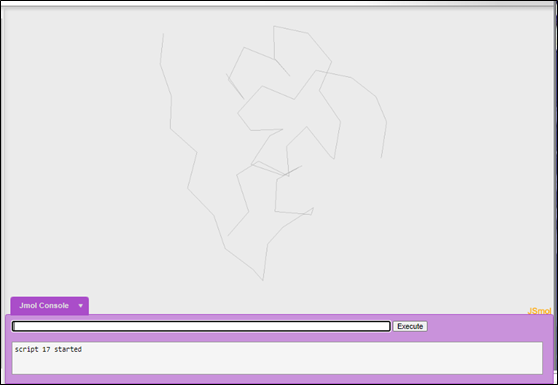
2. JUDE Windows:
Once launched, JUDE will display one window that looks like this:

The console window is located at the bottom right of the page. All commands (i.e., syntax) is input through the “Jmol Console” window.

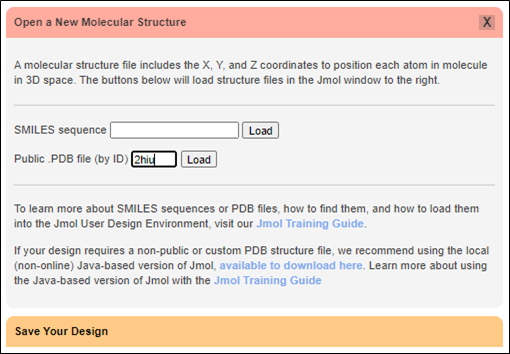
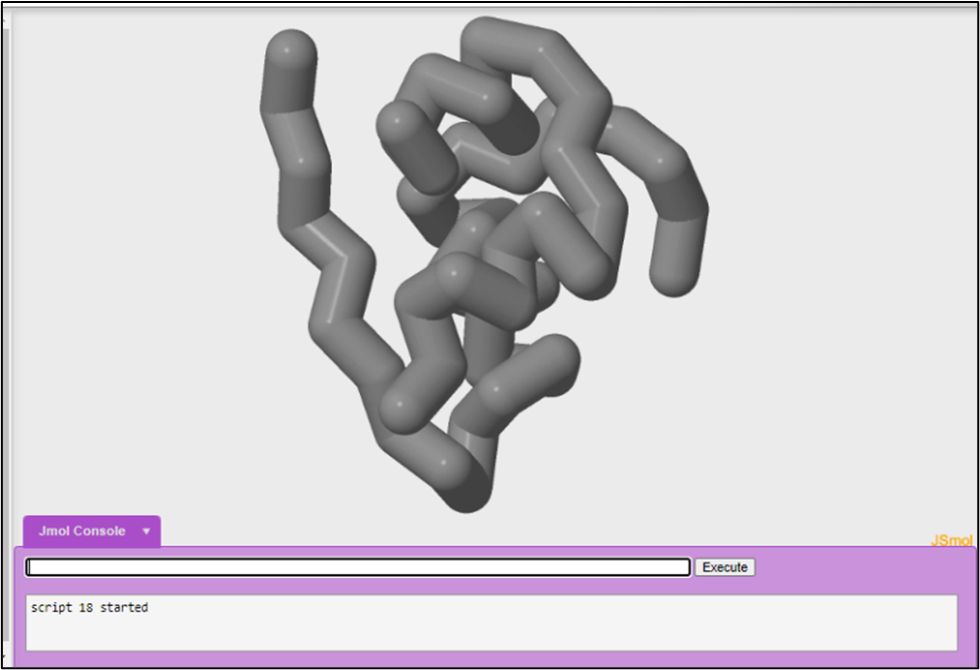
3. Opening your Insulin .pdb File
We will be using the 2hiu pdb file. To open this file, click the red “Open a New Molecular Structure” bar on the left side of the screen.
Then type 2hiu into the “Public .PDB file (by ID)” bar. Click “Load”.
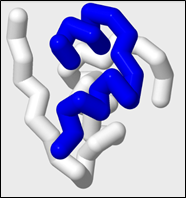
Once you have clicked okay, you should see the 1tyl file in your display window. It will look like this:
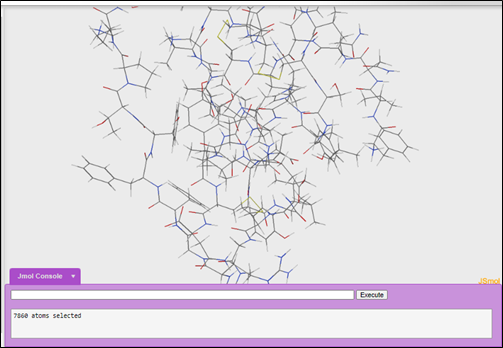
If you want to zoom in and out, scroll up and down on your mouse. To zoom in/out without a mouse, hold the shift-key, then click and drag up to zoom in or click and drag to zoom out.
4. Deciding how to display your molecule:
One of the most powerful features of JUDE is the ability to completely customize how your structure is displayed. Every protein or molecular structure can be visualized in an endless variety of ways, each highlighting different features of the structure. When designing your model you may want to consider the following:
- Amino acids involved in binding a substrate or ligand
- Protein co-factors, ATP binding sites, DNA binding sites
- Does the protein function in a dimeric (or multimeric) state? If so, do you want to display the dimer? And if you model the dimer, do you want to show different things in the two monomers?
- Are there structural features you want to emphasize in the model?
- Beta Sheets
- Alpha helices
- A loop that undergoes a major conformational change when activated
- Disulfide bonds
- Individual chains in a multichain protein
- An unusual gorge or pocket or domain that is important to protein function
- An amino acid that, when mutated, impacts protein function
- Any ligands associated with the protein in your pdb file? (You will need to know how to call these up in JUDE; the pdb webpage will include a list of ligands and their abbreviations.) (CREST Jmol Resources, n.d.)
See protein data bank page on where to find this information on the 2hiu protein databank page.
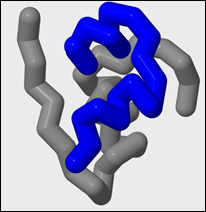
5. Backbone Display Formats:
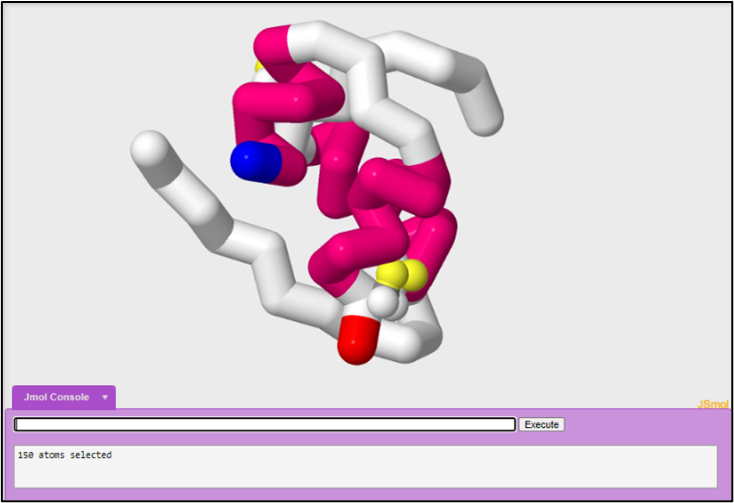
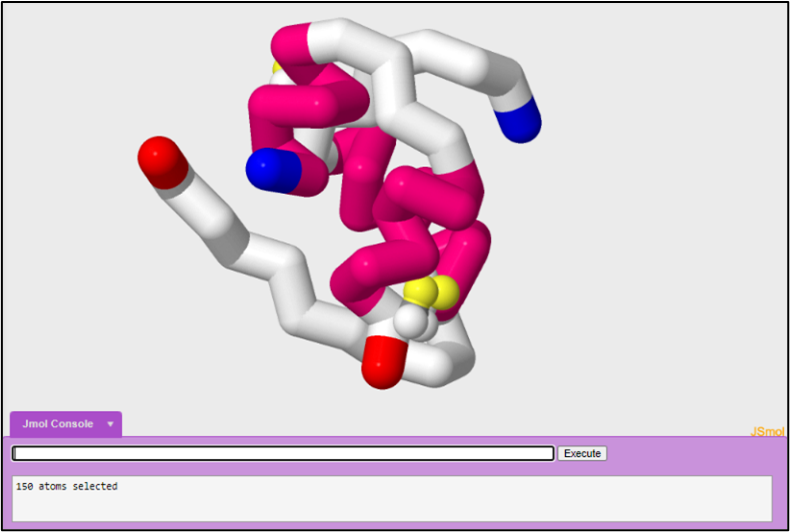
Your current view of the the insulin protein does not show you much about the structure of the protein. By using some simple commands, you can change the way the molecule is displayed and highlight different structures within the protein.
In order to clearly see the secondary structures within the protein you can use the backbone format. The backbone format displays the position of the alpha carbon in each amino acid by a bend in the backbone. All other atoms within the amino acid are not displayed.
To turn all other formats off and turn only backbone on:
backbone only
There are other display formats and commands that you can use when modeling in JUDE. To explore those formats and associated commands, check the JUDE commands page here (you can use Jmol commands).
6. Adding thickness to Display Formats:
Many of the display formats can be further altered by changing the thickness. To do this, simply add a number after any display format when typing the command into the console. The number added after the display format must include a decimal.
To display the backbone format with 1.5 angstrom (a unit of length equal to one hundred-millionth of a centimeter, 10^-10) thickness:
backbone 1.5
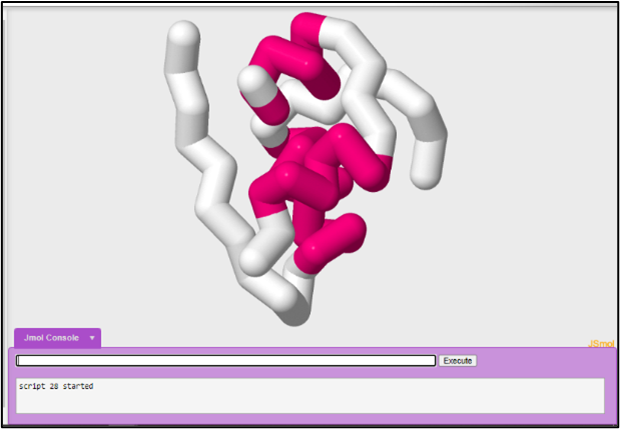
7. Selecting Chains and Coloring Selected Chains:
Many protein structures have more than one polypeptide chain. When a protein has more than one polypeptide chain, the protein is considered to have quarternary structure. These chains are labeled with single letter identifiers in the .pdb file and can be selected by entering a colon (:) followed by the letter identifier. Only the atoms in chain you select will be affected by future commands.
The protein insulin has two chains. Chain A and Chain B.
To select for chain A:
select :a
To color chain A blue:
color blue
To select for chain B on the first monomer:
select :b
To color chain B on the first monomer white:
color white
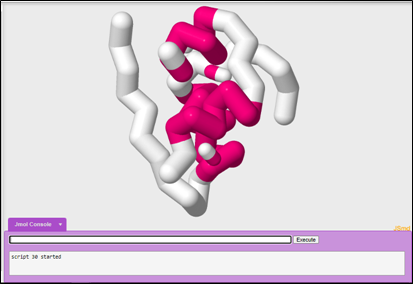
You may decide to highlight secondary structure instead of the two polypeptide chains that make up the insulin protein. You would use the color structure command to color the model by secondary structures. Helices will be colored magenta, beta sheets will be colored yellow, and loop regions will be colored white.
Since you currently have your B chain selected you will have to select all again to color the entire protein by structure.
To select all:
select all
To color by structure:
color structure
There are other select commands and color commands that you can use when modeling in JUDE. To explore those commands, check the JUDE commands page here.
8. Adding Bonds:
JUDE has the ability to render different bonds within the protein like Hydrogen Bonds and Disulfide Bonds between Cysteine amino acids. If you wanted to 3D print your protein, you could also add additional structural supports called Struts.
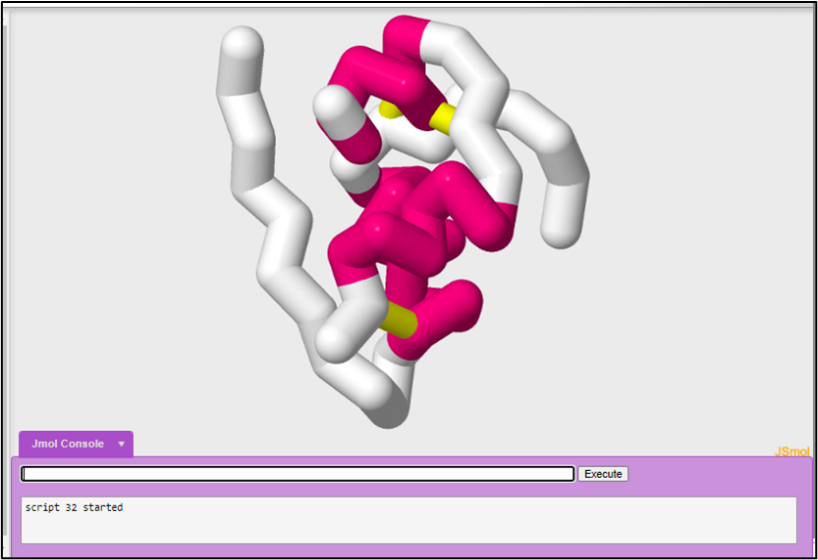
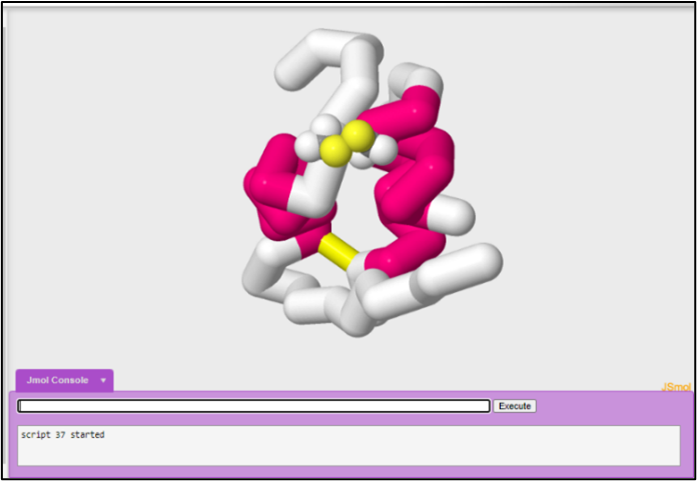
One important feature of our insulin protein is the presence of disulfide bonds. In order to show all of the disulfide bonds in insulin, you will need to select all.
To select all:
select all
To show your disulfide bonds at 1.0 angstrom thickness:
ssbonds 1.0
Disulfide bonds occur between two cysteine amino acids. Your disulfide bonds currently look like they are floating, because the backbone format only shows the position of the alpha carbon.
To set your disulfide bonds in the backbone:
set ssbonds backbone
To color the disulfide bond yellow:
color ssbonds yellow
To see explore to add how to add and format hydrogen bonds, check the JUDE commands page here.
9. Adding sidechains:
We are currently using the backbone format. This format only displays the position of the alpha carbon in each amino acid by a bend in the backbone. All of the other atoms within the amino acid are not displayed, including the sidechain (also known as an R-Group).
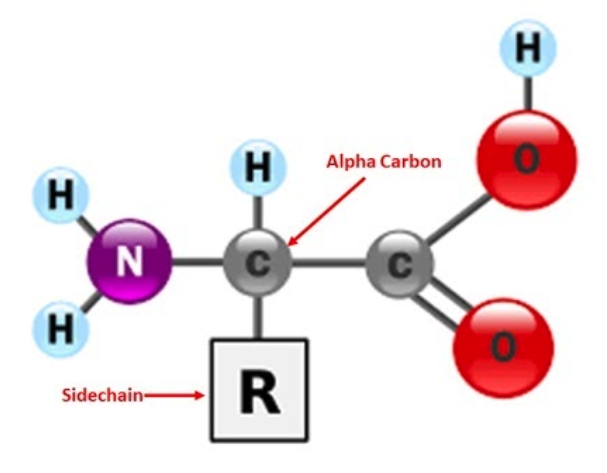
Sometimes you may wish to display an amino acid's sidechain with the rest of your protein structure in backbone format, because it is crucially important to telling the story of your protein. For example, instead of highlighting the disulfide bonds, you may wish to show the cysteine sidechains that form the disulfide bonds in your insulin protein (CREST Jmol Resources, n.d.).
To select the particular sidechain, you can use the amino acid sidechain three letter abbreviation and the number of the amino acid in the protein. You need to be careful here because there can be more than one amino acid with a given number if there are more than one polypeptide chains in a structure file (CREST Jmol Resources, n.d.).
Remember this map of the insulin protein from the Insulin: mRNA to Protein activity:

Image from 3D Molecular Designs: https://www.3dmoleculardesigns.com/Teacher-Resources/Insulin-mRNA-to-Protein-Kit.htm
This map shows that Cys7 of the B-chain forms a disulfide bond with Cys7 of the A-chain. Cys19 of the B-chain forms a disulfide bond with Cys20 of the A-chain. A third disulfide bond forms between Cys6 and Cys11, both from the A-chain.
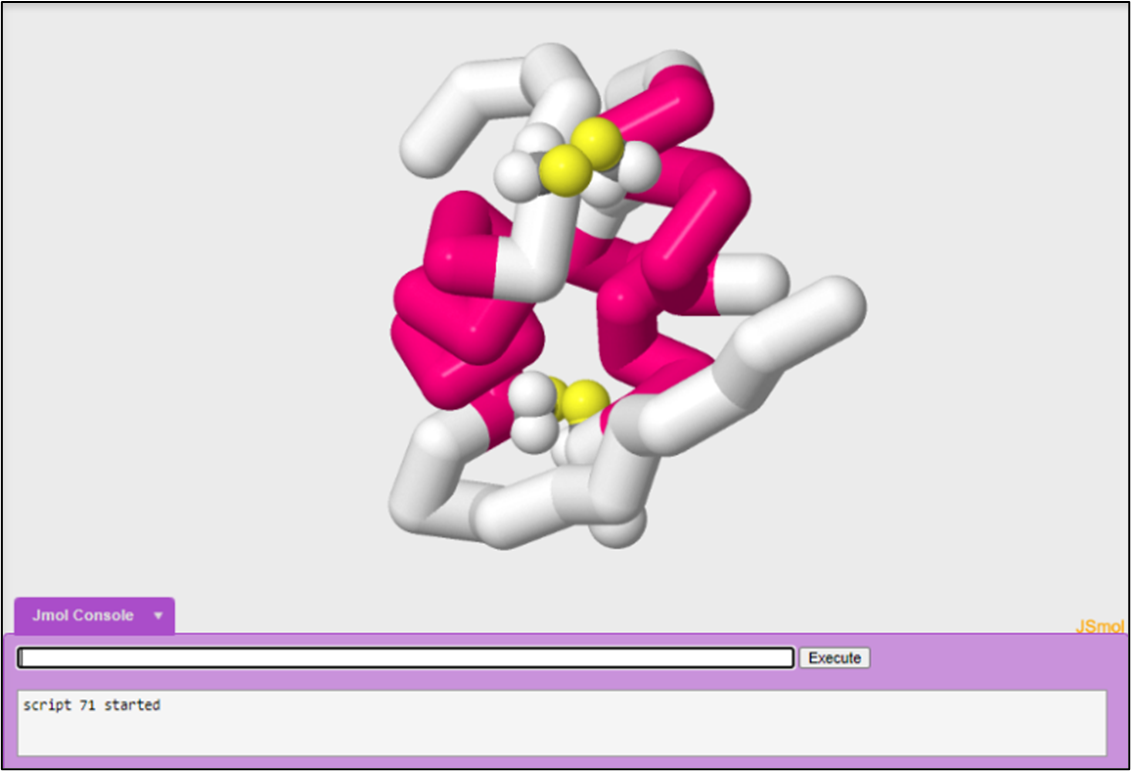
To add your sidechains you are going to do a series of commands in JUDE. You will use the select, spacefill, and wireframe commands.
To select for Cys7 to show a clean sidechain (note that this command selects both the Cys7 of the A-chain and Cys7 of the B-chain):
Select cys7 and sidechain
The use of and in this command is a boolean operator. This command selects for atoms in cys7 and the sidechain (R-group) of the amino acids. Remember an 'and' boolean operator has to fulfill both conditions.
To add the spacefill format with a 1.25 Angstrom thickness:
spacefill 1.25
To add the wireframe format with a 1.0 Angstrom thickness:
wireframe 1.0
To color the carbon's gray, the hydrogen's white, oxygen's red, nitrogen's blue, and sulfur's yellow:
color cpk
You can select for multiple sidechains at the same time.
To select for cys19 and cys20, spacefill to 1.25 angstrom thickness, wireframe to 1.0 angstrom thickness, and color cpk:
select cys19, cys20 and sidechain
        spacefill 1.25
        wireframe 1.0
        color cpk
If you play with the viewer on JUDE, you may notice that we have not yet added sidechains to one of the disulfide bonds. What is the argument to not showcase the disulfide bond between cys 6 from the A chain and cys11 from the A chain?
If you choose to not highlight this bond and did not want to show the bond at all, you can turn the disulfide bonds off.
To turn disulfide bonds off:
select all
        ssbonds off
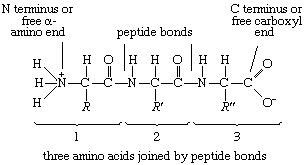
10. Coloring the N-terminus and the C-terminus:
You may want to highlight where the N-terminus and C-terminus on each sidechain is. Remember due to the way that amino acids link together, all proteins show the same pattern in connection. Look at the image below and see if you can find the pattern. This means that you polypeptide chain has directionality.
Using the protein data bank sequencing page for 2hiu (https://www.rcsb.org/pdb/explore/remediatedSequence.do?structureId=2HIU), you can find the N-terminus and C-terminus for each polypeptide.
The sequence for chain A looks like this:
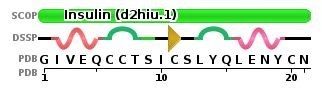
Image from The Protein Data Bank: https://www.rcsb.org/pdb/explore/remediatedSequence.do?structureId=2HIU
The N-terminus is found on the first amino acid in the chain. In this chain, the first amino acid is G or Gly. The protein databank only uses one letter abbreviations, you can find a great amino sidechain chart here.
To select for Gly:
select gly1
To color blue:
color blue
To select for the C-terminus:
select asn21
To color red:
color red
The sequence for chain B looks like this:
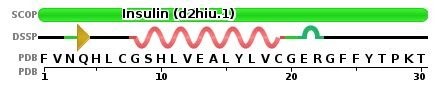
Image from The Protein Data Bank: https://www.rcsb.org/pdb/explore/remediatedSequence.do?structureId=2HIU
To select for the N-terminus on chain B:
select phe1
To color blue:
color blue
To select for the C-terminus on chain B:
select thr30
To color red:
color red
You could simplify this code and select for both of your N-termini at the same time:
select phe1, gly1
To color blue:
color blue
The same applies for your c-termini:
select thr30 or asn21
        color red
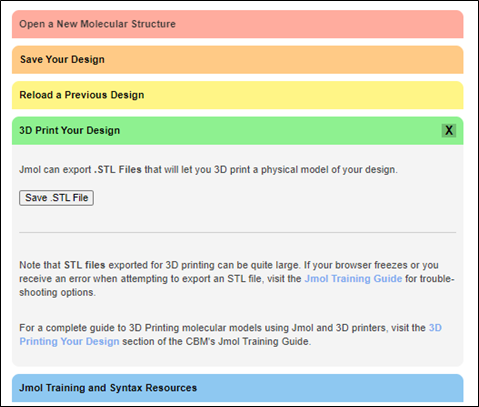
11. Saving your file to 3D print
Once you have the file that you want in JUDE, you can export your file to an STL file. STL files store information about 3D models by describing only the surface geometry of a three-dimensional object without any representation of color, texture, or other common model attributes. Your saved STL file will then be used in conjunction with a 3D slicer to 3D print your model.
While any design would work for creating a printable image or interactive webpage, certain design specifications work better for 3D printing than others. Below are some suggested sizes, formats, and design specifications from the Milwaukee School of Engineering Center for Biomolecular Modeling.
- backbone 1.5
- wireframe 1.0
- spacefill 1.25
- hbond 1.0
- strut 1.0
- ssbond 1.0
To save your model of 2hiu at an STL file, click “3D Print Your Design” on the left side of the page.
Penn State University Park uses Dremel 3D45 printers. Dremel has a print cloud website where you can create a free account, log in, and upload new files. Once the files are uploaded to the cloud, users can repair, layout, and slice their 3D models before printing them. If you would like more information on this process, it can be found here.
12. Saving your JUDE session for later:
JUDE allows you to save your modeling sessions as .SPT files to view or edit them at another time. An .SPT file saves all aspects of your model (i.e., coloring and structure format). To save your session as an .SPT file, click the “Save Your Design” bar then click “Save .SPT File”. The file will be saved to your downloads folder.
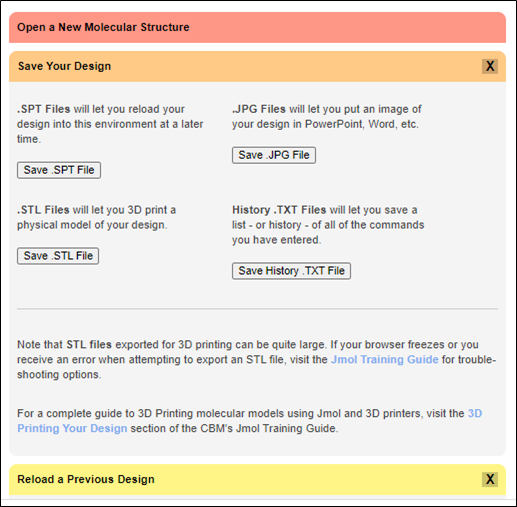
To load a save session simply drag the .SPT file into the modeling window. You can view a set of detailed instruction by clicking on the “Reload a Previous Design” bar.
***Tip: When working in your SMART Teams, you will have to create images of your models to present the molecular story. Once you have identified what idea you want to show, immediately create an .SPT file after the .PNG file. Minor tweaks are often made to the model to perfect the original idea/image and saving the exact image as an .SPT file allows you to make the minor changes that you desire quickly. This will save a MASSIVE amount of time.
13. Other commands you may find useful:
Some molecular structures include additional small molecules that are not proteins. These molecules are given a three character alpha-numeric identifier that can be used to select them. The file 2hiu.pdb does not contain any small and unique molecules. Some of the .pdb files you will be looking at later today may contain small and unique molecules that you want to select for and highlight in your model (CREST Jmol Resources, n.d.).
To determine the three character identifier, you can click on the JUDE display window or review the structure summary page for the .pdb file on the Protein Databank (www.pdb.org) website (CREST Jmol Resources, n.d.). When looking at the structure summary page of the .pdb file, you can scroll down to see if it contains any small molecules. Let's use hemoglobin (1a3n) as an example. The structure summary will look like this:
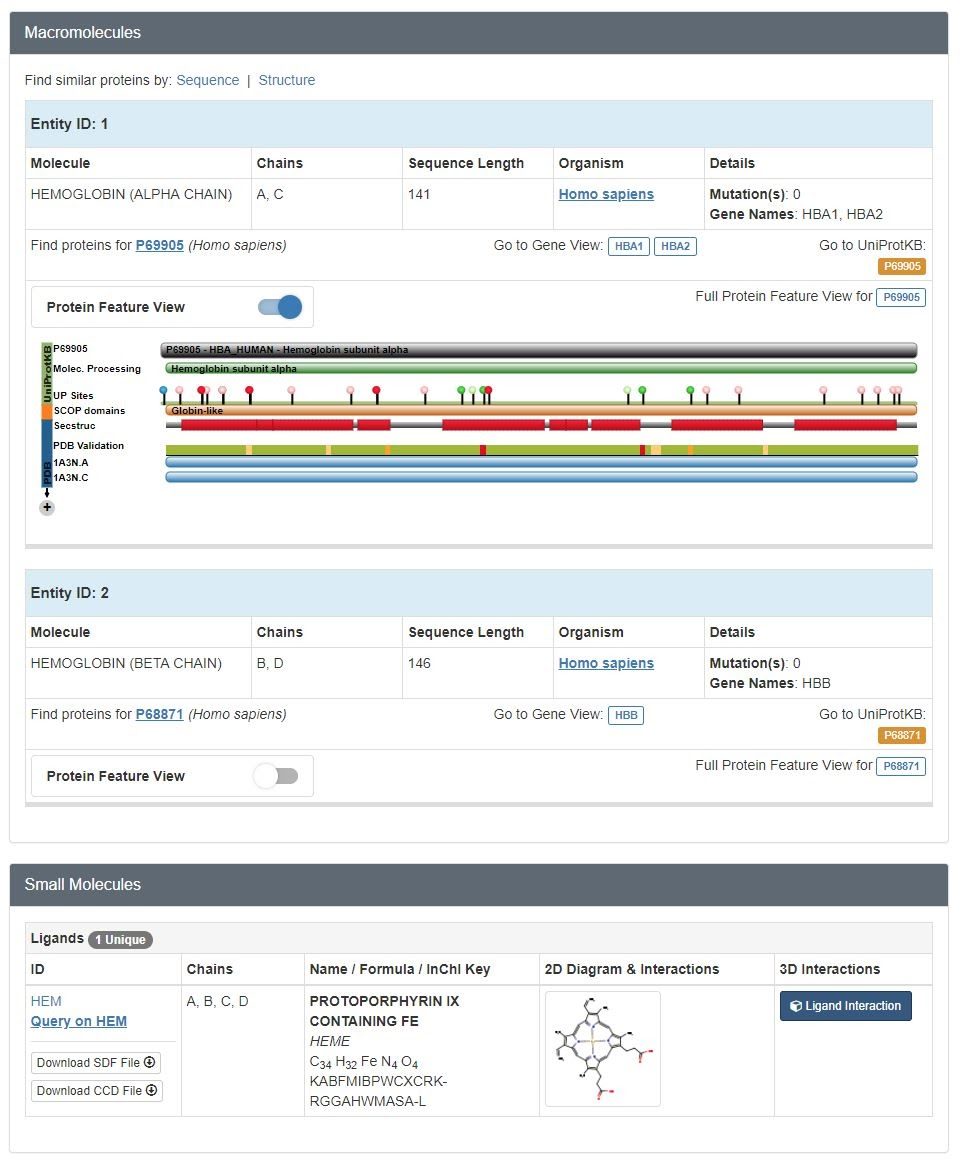
To select for the small molecule HEM:
select hem
You may also want to restrict or only show listed residues or small molecules.
To only show the hem group listed above:
restrict not hem
References:
CREST Jmol Resources. (n.d.). Retrieved from http://cbm.msoe.edu/crest/crestJmolResources.php